
Are you looking for a hassle-free way to obtain your tax identification? Knowing how to register PAN using Nagarik App has made life much easier for thousands of Nepalese citizens. Gone are the days of standing in long queues at the Inland Revenue Department. In this complete guide, we will provide you with a simple, step-by-step process to get your Permanent Account Number (PAN) directly from your smartphone.
What is PAN and why do you need it?
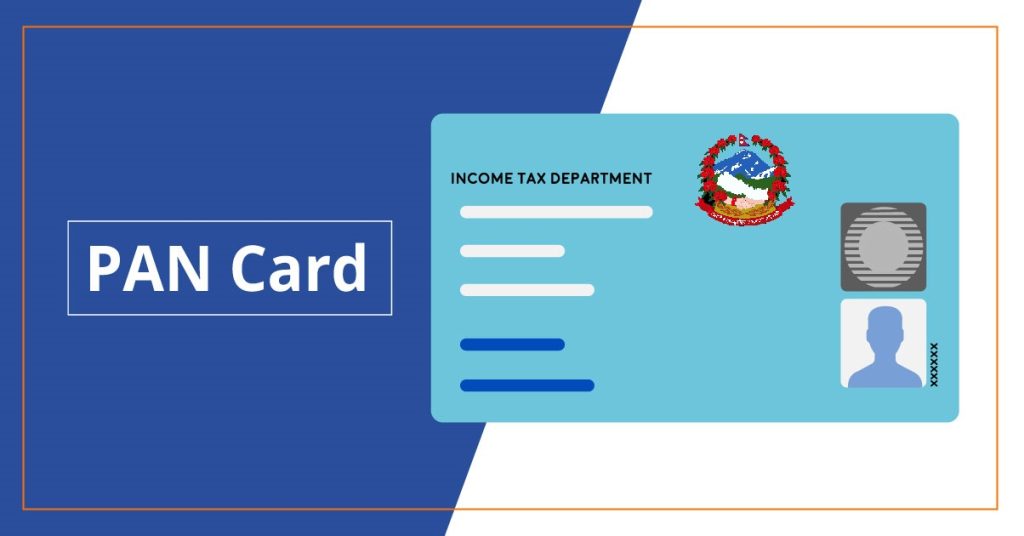
Permanent Account Number (PAN) is a unique 10-digit alphanumeric number provided by the government for any individual or taxpayer. Having a PAN identifies the holder as a taxpayer in Nepal. This is done to keep track of the taxes paid by the citizens.
PAN is used for various financial activities such as getting salary, import, export, asking for loans, buying mutual funds, business transactions, etc. It is mandatory for all the salaried workers of both private and government firms to register and have a PAN from the fiscal year 2019/20.
It is free of cost and can neither be changed nor renewed once it is issued. Although by now, many have their PAN cards, some are still struggling with the procedure of PAN registration in Nepal. However, you can easily issue your PAN using Nagarik App.
How to Register PAN Using Nagarik App?
In order to register your PAN, you need to register for Nagarik App. For this, you need to verify your citizenship details. I have already written an article on how to register for Nagarik App. If you haven’t made a Nagarik App account yet, you can go through this article if you need help.
Check out this article if you need help.
How to Register Nagarik App? – A Complete Guide – TechnoKD
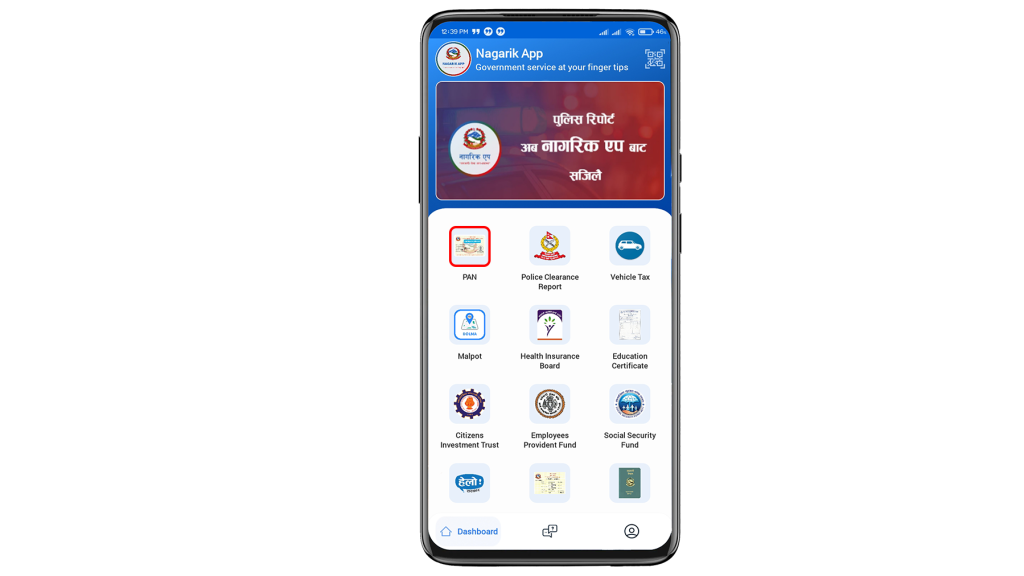
After you have registered for Nagarik App, you can apply for PAN from your Dashboard. Similarly, you can use other different features of this app.
Watch the Video Tutorial
If you prefer watching the process in action, check out our step-by-step video guide below. It will show you exactly how to navigate the app and complete your PAN registration in just a few minutes:
Follow these steps to register your PAN using Nagarik App:
Download Nagarik App:
Download for Android (Google Play Store)
Download for iOS (Apple App Store)
1. Login to your Nagarik app.
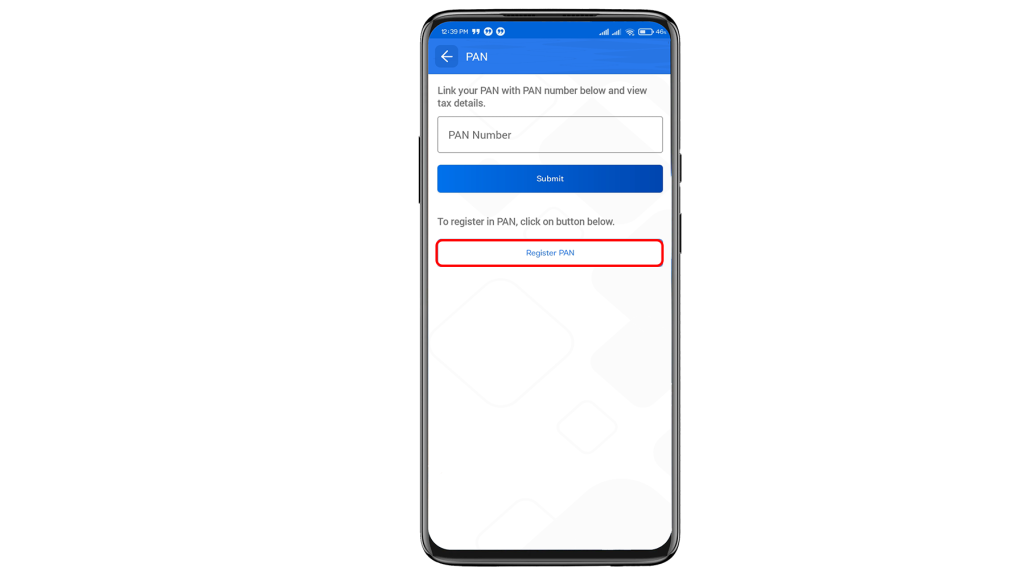
2. Click on the ‘PAN’ option from the dashboard.
3. Tap on the ‘Register PAN’ to apply for a PAN number.
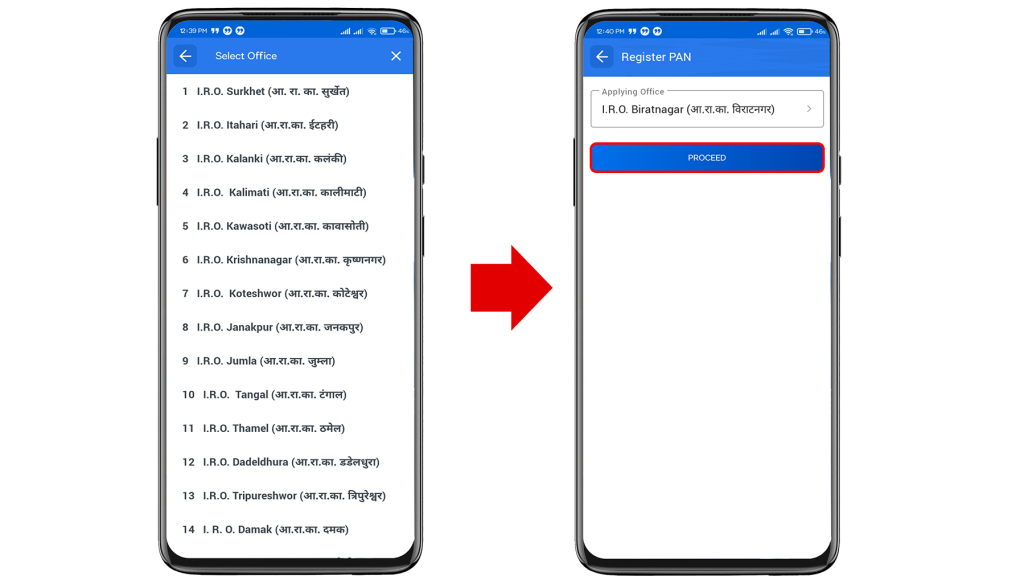
4. Select the office nearest to you and ‘Proceed.’
5. Enter all the required details, attach a passport size photo and click on ‘Proceed’.
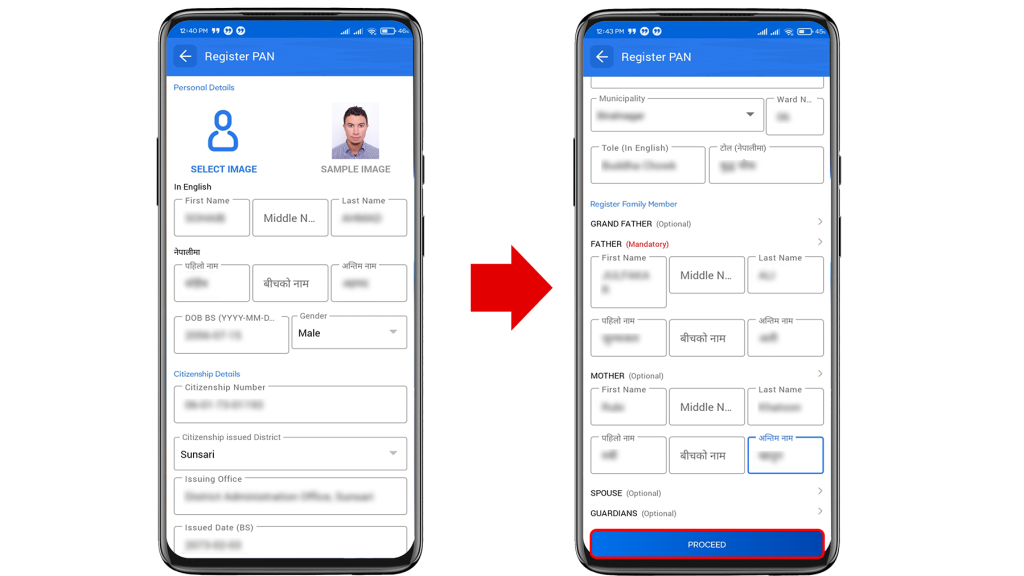
Information Required:
- Name
- Date of Birth
- Citizenship Number
- Citizenship issued date and district
- Permanent Address
- Current Address
- Family Details
- Passport Size Photo
6. Confirm all the details and ‘Submit’ your application.
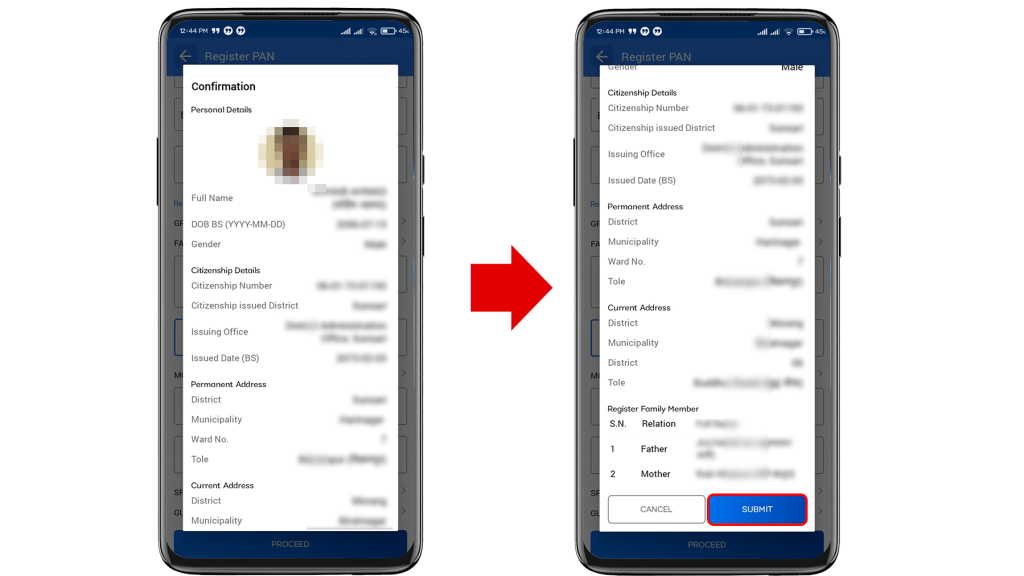
7. After completion, you will receive your PAN within the app.
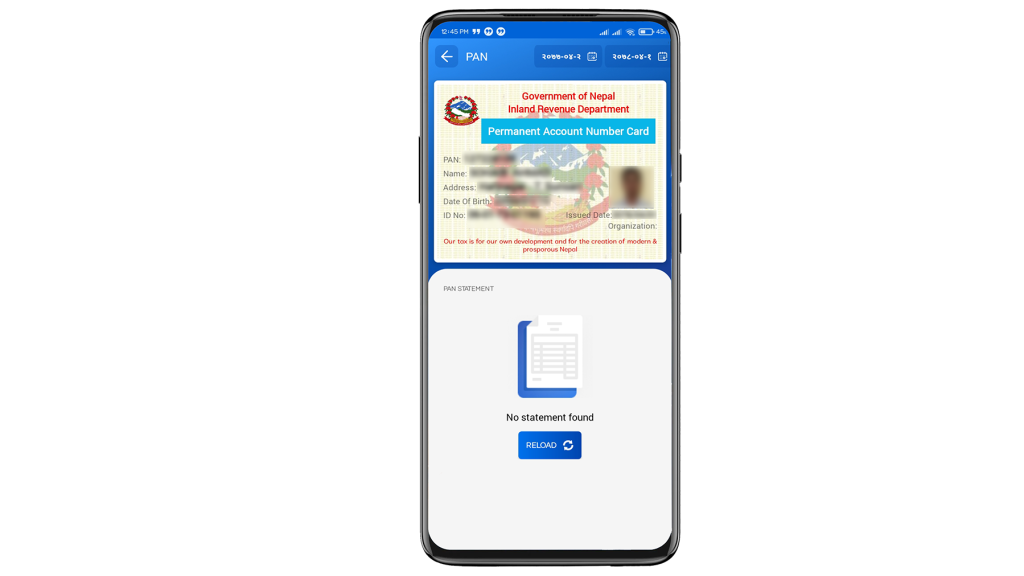
Following these steps, you can easily register for PAN using Nagarik App. You don’t need to stand in long queues just for this simple task. You can use other different features of the Nagarik App. If you have any queries regarding this topic, do comment to us.
Frequently Asked Questions (FAQs)
Is it mandatory to have a PAN card for every citizen in Nepal?
While it is mandatory for all salaried employees, it is highly recommended for everyone to have a PAN for various financial activities like opening bank accounts and taking loans.
How long does it take to get a PAN after applying via Nagarik App?
Once you submit the application, it is usually processed very quickly, often within a few minutes to a few working days, depending on the tax office’s verification.
Can I update my personal details on the PAN card later?
Yes, you can update your details through the Inland Revenue Department (IRD) portal or by visiting your nearest tax office if there are major discrepancies.
Is there any cost for PAN registration through Nagarik App?
No, registering for a PAN via the Nagarik App is completely free of cost.
What if my application gets rejected?
If rejected, the app will usually display the reason. Ensure that your uploaded photo and citizenship details are clear and match the data in the system.
Conclusion
Registering for a PAN has never been this simple. By using the Nagarik App, you have successfully saved hours of time that would otherwise be spent in government office queues. We hope this guide on how to register PAN using Nagarik App was helpful to you.
Related Article: If you haven’t set up your account yet, read our guide on How to Register Nagarik App? – A Complete Guide.